Step 9 (Color adjustments to the water ripples)
مرحله 9 ( تنظیمات رنگ بر روی موج های آب )
To match the color of the water ripples with the surrounding we should give color adjustment to this layer. We will give it two adjustment layers with clipping masks each: hue/saturation and brightness/contrast. Set the values of the both adjustment layers as shown below:
برای یکسان کردن رنگ موج ها با محیط اطراف ما باید بر روی این لایه تنظیمات رنگ color adjustment انجام دهیم. ما می خوایم به این دو تا لایه ی تنظیم رنگ بدهیم با حالت Clipping Mask
یکی hue/saturation و دیگری brightness/contrast
مقدار هر دو لایه ی تنظیم فوق را مطابق تصاویر زیر تنظیم کنید.

Set the hue/saturation layer to normal blending at 80% opacity meanwhile the brightness/contrast layer is set to normal at 100% opacity. Select all the water ripples layer and hit Ctrl+G to group them in a folder. I named this folder water ripples.
حالت لایه ی hue/saturation را به normal تغییر دهید با شفافیت حدود %80 در ضمن حالت ترکیب لایه ی brightness/contrast را به حالت normal با شفافیت حدود %100 تنظیم کنید.
تمام لایه های موج آب را انتخاب کنید و Ctrl + G را همزمان فشار دهید تا همگی در یک گروه قرار گیرند.
من اسم این گروه را "موج های آب" نامگذاری کردم.
Step 10 (more color adjustments)
مرحله 10 ( تنظیمات رنگ بیشتر )
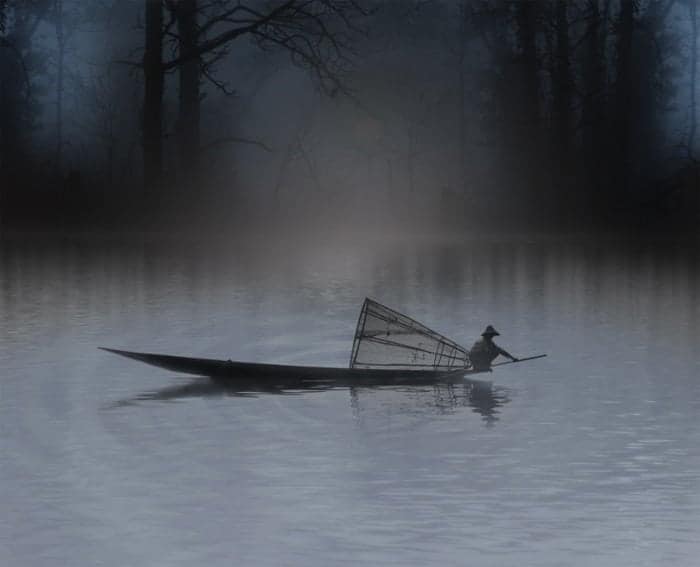
From this step on to the next three steps ahead, we will do color adjustments to the scene. We will do this by painting some solid color to the scene. Firstly, create a new layer above the BG folder (step 5-6) on which we will paint the first color. We use color of #0c84cf. Take a very soft round brush (0% hardness) set to low opacity of about 10-15%. On this new layer, paint the color to some area on the left and right side of the scene. Here is the result I created for this color layer set in normal blending mode at 100% opacity.
در این مرحله ما می خواهیم تنظیمات رنگ صحنه را انجام دهیم. ما این کار را با نقاشی کردن کمی رنگ روی صحنه انجام خواهیم داد.
خب اول یک لایه ی جدید روی پوشه ی BG ایجاد کنید که در آن ما می خواهیم اولین رنگ را نقاشی کنیم. ما از رنگ #0c84cf استفاده می کنیم. یک براش خیلی نرم با لبه های گرد و میزان سختی %0 انتخاب کنید و میزان شفافیت آن را حدود 10 تا %15 درصد تنظیم کنید. روی این لایه ی جدید رنگ را بر روی برخی نواحی سمت چپ و راست صحنه نقاشی کنید. در اینجا نتیجه ی کار من روی لایه ی رنگ بر روی صحنه را می توانید مشاهده کنید. در حالت ترکیب normal با شفافیت %100

We can reduce the opacity of this layer if we stroke the color too much to meet the desired color we want. For this layer, I needed to reduce the opacity to just 25%. This is the part of this tutorial which is really experimental meaning that we should do the so called trial and error effort to play with colors, blending option and opacity to get the result we want.
ما می توانیم میزان شفافیت این لایه را کاهش دهیم چنانچه غلظت رنگ ما خیلی زیاد تر از رنگ دلخواهی است که رای این لایه می خواهیم . من فقط به شفافیت حدود %25 درصد برای این کار نیازم دارم.
Step 11 (more color adjustment)
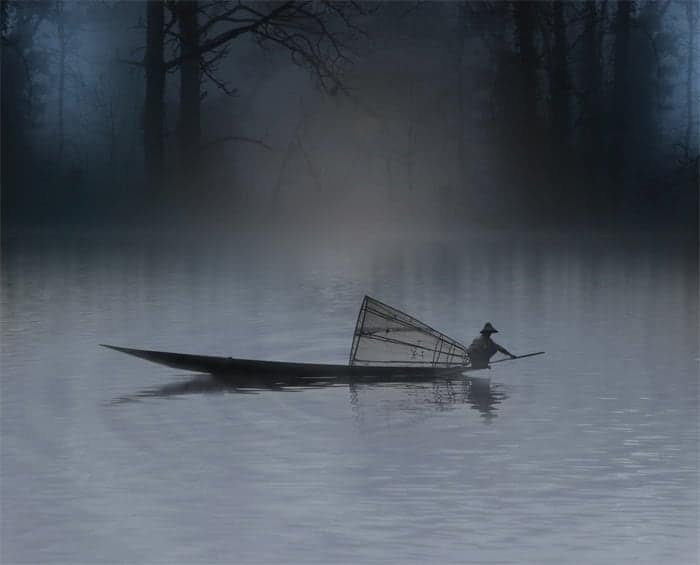
Create again a new layer above the previous color. Take a very soft round brush to paint more color on this new layer. This time we use color of #5b6776. With the soft round brush set to opacity of about 10-14% paint the color as the one below to certain parts of the scene:
مرحله 11 (کار بیشتر رو color Adjustment)
یک بار دیگر لایه ی جدید روی رنگ قبلی ایجاد کنید. از یک براش خیلی نرم با لبه های گرد برای اضافه کردن رنگ بیشتر به این لایه استفاده کنید. این بار از رنگ 5b6776 # استفاده می کنیم.
با استفاده از یک براش نرم با لبه های گرد و رنگ داده شده میزان شفافیت براش را حدود 10 تا 14 درصد تنظیم کنید و شروع کنید به نقاشی کردن رنگ روی صحنه همانند تصویر زیر

Here is the result so far

Step 12 (And more color)
Create another new layer above the two previous layers. On this new layer, paint soft white color to areas around the scene. Here is the white color of this layer I created which is set to normal at 100% opacity.
مرحله 12 (اضافه کردن رنگ های بیشتر)
یک لایه ی جدید دیگر روی دو لایه ی قبلی ایجاد کنید. روی این لایه با استفاده از براش نرم با لبه های گرد و با رنگ سفید شروع به نقاشی کردن اطراف قایق شوید.
اینجا رنگ سفیدی که من اضافه کردم روی لایه را می توانید ببینید
با شفافیت حدود 100 درصد و حالت ترکیب normal

حالا حالت ترکیب لایه را به overlay تغییر دهید با شفافیت 30 درصد

Step 13 (The last color adjustment)
Create the last new layer on which we will paint more color to the scene. We use color of #1afcfc. Here is the one I created in normal blending at 100% opacity.
مرحله 13 (آخرین تنظیمات color Adjustment)
یک لایه ی جدید روی لایه های قبلی رنگ آمیزی صحنه ایجاد کنید تا رنگ های بیشتری به صحنه اضافه کنیم.
از رنگ 1afcfc # استفاده خواهیم کرد.
با یک براش نرم و رنگ داده شده با شفافیت 100 درصد همانند زیر روی صحنه نقاشی کنید.
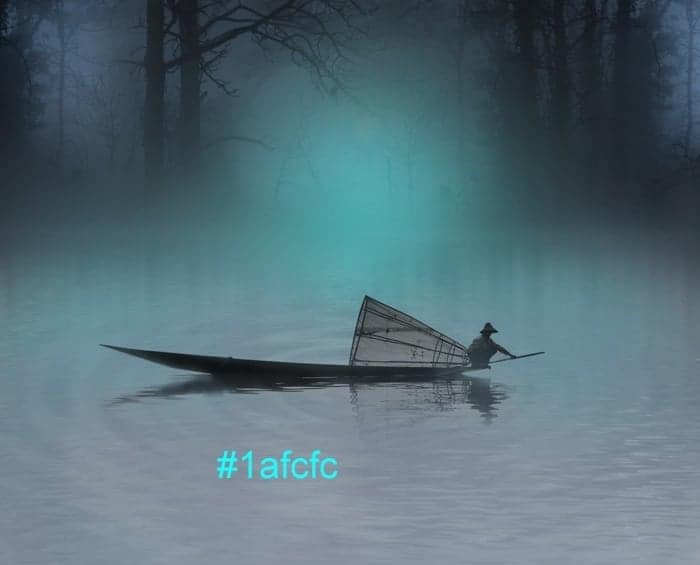
And here is the result when this layer is set to normal at about 20-25% opacity. Select all the color layers and group them in a folder. I named this folder color
شفافیت لایه را حدود 20 تا 25 درصد قرار بدهید.
تمامی لایه های مربوط به رنگ آمیزی را انتخاب کنید و آنها را در یک پوشه یا گروپ قرار بدهید.
من اسم این پوشه را color گذاشتم.
Step 14 (Adding some highlight)
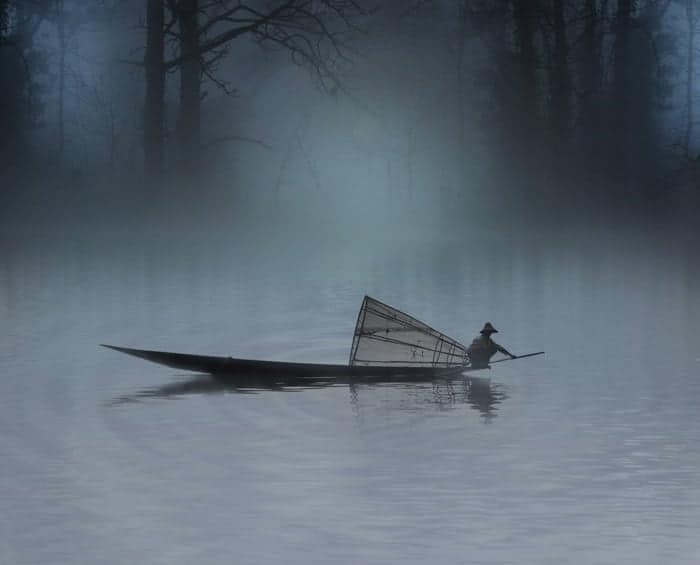
Create a new layer above the fisherman folder. Set this layer to overlay and make sure to check Fill with Overlay-neutral color (50% gray) to fill this new layer with gray color.
مرحله 14 (افزودن برجستگی به صحنه)
یک لایه ی جدید روی پوشه ی fisherman یا ماهیگیر ایجاد کنید.
حالت این لایه را روی overlay تنظیم کنید و پیش فرض های مربوط به لایه مانند تیک fill this new layer with gray color را بررسی کنید.
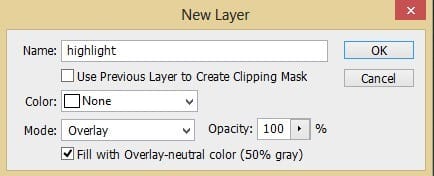
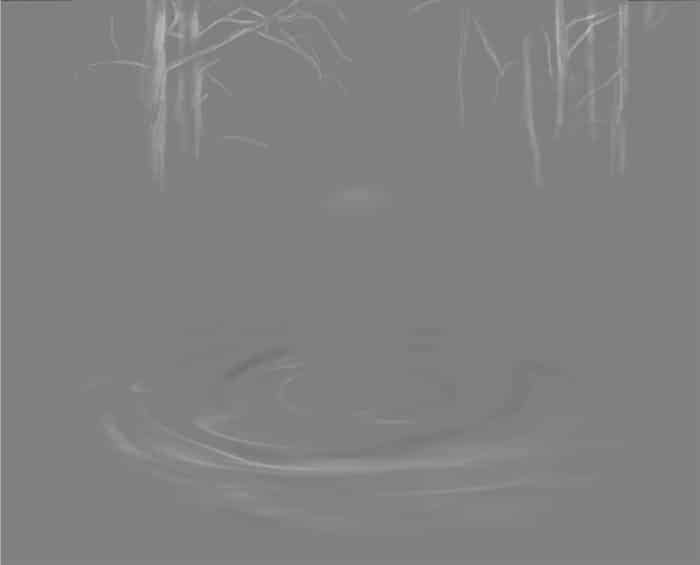
On this new layer, paint soft white color on the trees and water ripples to give some highlight. Here is the layer set to normal at 100% opacity I created.
روی این لایه ی جدید با نقاشی کردن رنگ سفید با براش نرم برای برجسته کردن درخت ها و امواج آب استفاده می کنیم.
همانند تصویر زیر که حالت ترکیب normal هست با شفافیت 100 درصد.
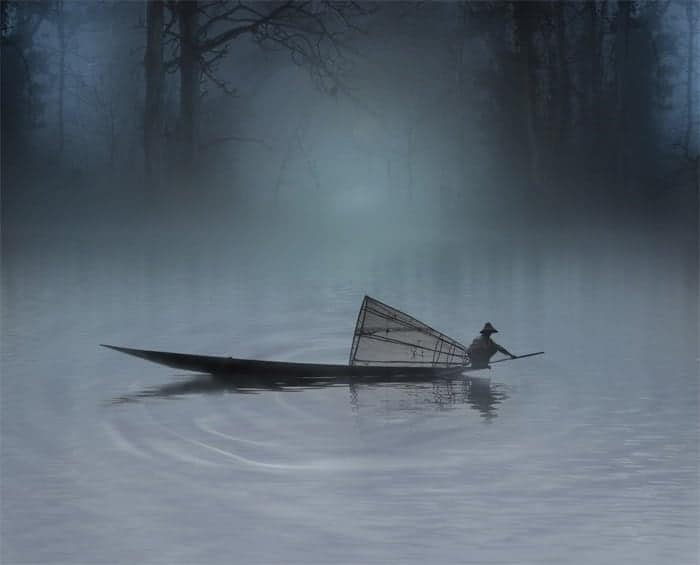
This is the result in overlay at 100% opacity.
حالت ترکیب لایه را به overlay تغییر دهید.
Step 15 (Light on boat)
Select and open the fisherman folder. Create a new layer with a clipping mask above the two hue/saturation layers within this folder. Set this layer to color blending at 100% opacity. Take a very soft round brush and paint red color (#fb080b) to have something like the one below:
مرحله 15 (سایه روشن روی قایق)
پوشه ی ماهیگیر را باز کنید. یک لایه ی جدید به عنوان clipping mask روی دو لایه ی hue/saturation داخل این پوشه ایجاد کنید.
میزان شفافیت این لایه را 100 درصد کنید و با یک براش خیلی نرم با لبه های گرد شروع به نقاشی کردن رنگ قرمز fb080b # روی بخشی از قایق شوید همانند تصویر زیر

Step 16 (Illuminating the light)
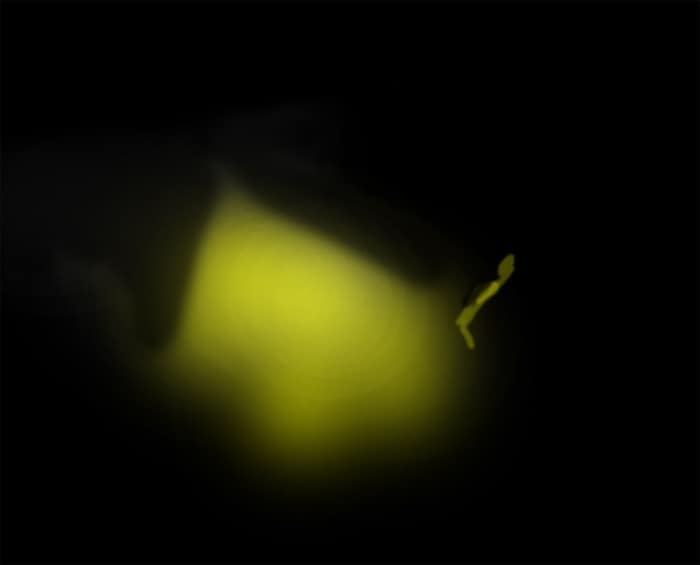
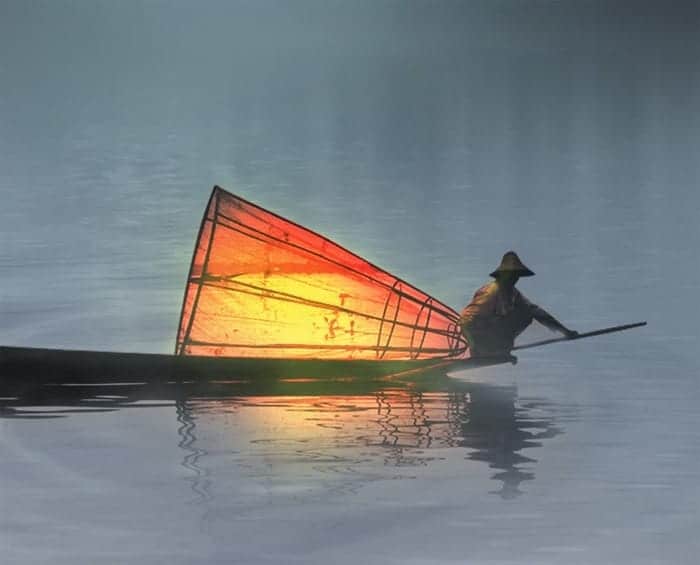
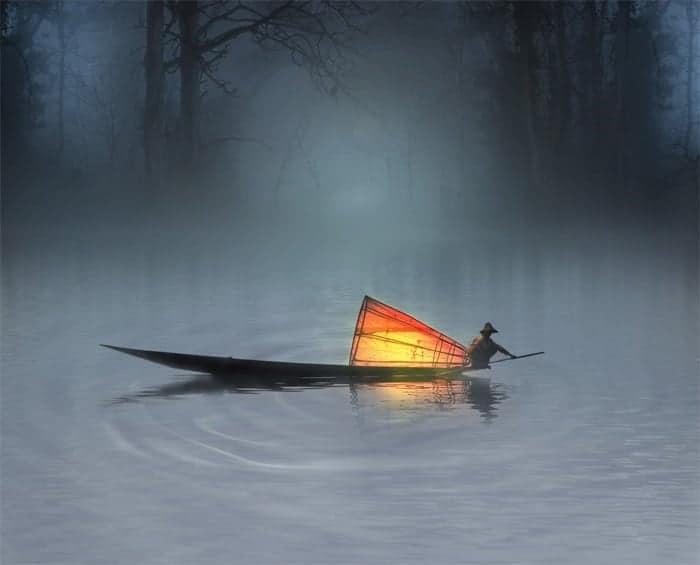
Proceed to create another new layer above the fisherman folder. Fill (Shift+F5) this layer with black. Set this layer to color dodge blending. Take a very soft round brush set to a very low opacity of about 4-5%. Finally, paint the combination of yellow and a bit white color to illuminate the red color (step 15) and some areas around the boat. Here is the normal blending of this layer I created:
مرحله 16 (روشنایی نور)
یک لایه ی دیگر روی پوشه ی ماهیگیر ایجاد کنید. این لایه را با رنگ سیاه پر کنید Shift + F5
حالت ترکیب این لایه را روی dodge قرار بدهید.
از یک براش خیلی نرم با شفافیت خیلی کم حدود 4 تا 5 درصد استفاده کنید.
در نهایت با ترکیبی از رنگ زرد و کمی سفید برای روشنایی بخشیدن به رنگ قرمز که در مرحله قبل ایجاد کردیم و بخش های اطراف قایق استفاده کنید.
اینجا نتیجه کار من با حالت ترکیب نرمال رو می توانید ببینید.
And here is the result:
در اینجا هم کار را با حالت ترکیب dodge می بینیم.
Step 17 (Foreground for the scene)
In this step we will add foreground for the scene. We will use some water lily as the foregrounds. Open the water lily image and cut out part needed.
مرحله 17 (منظره جلو عکس برای صحنه)
خب در این مرحله می خواهیم منظره جلوی صحنه ایجاد کنیم. ما می خواهیم از سوسن سفید یا زنبق آبی برای این منظور استفاده کنیم.
تصویر سوسن سفید را بازکنید و بخش های مورد نیاز را از آن بردارید.

Place the cut out to the main scene. Scale its size and give it some Gaussian blur.
بخش انتخابی از سوسن سفید را به صحنه ی اصلی اضافه کنید.
مقیاس اندازه ی آن را متناسب با صحنه کنید و به آن مقداری Gaussian Blur بدهید.

Alter the color of this water lily layer a bit by giving it hue/saturation color adjustment layer with a clipping mask.
مقداری رنگ لایه ی سوسن سفید را با دادن hue/saturation به عنوان clipping mask به لایه تغییر می دهیم تا به نتیجه دلخواه و رضایت بخشی برسیم.

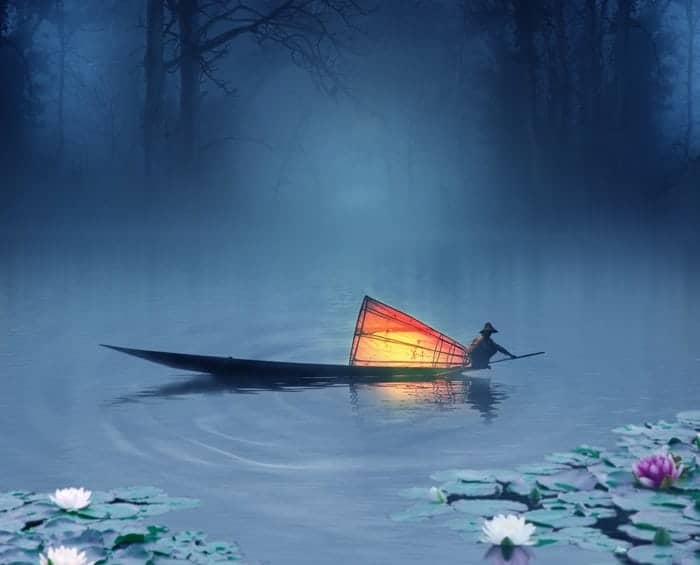
With the same step, add more water lily to left foreground. Here is the result so far.
مثل دو مرحله ی قبل یک سوسن سفید آبی دیگر را به سمت چپ منظره جلویی صحنه اضافه می کنیم

Step 18 (Overall Adjustments)
In this step we will set the overall color adjustment for the scene by giving it some new adjustment layers above all the other layers. Firstly, we will give it color balance set to the values given below:
مرحله 18 ( تنظیمات کلی)
در این مرحله ما می خواهیم تنظیمات کلی رنگ صحنه را همراه با دادن لایه های تنظیم جدید روی همه ی لایه های ایجاد شده انجام دهیم
خب اول ما می خواهیم لایه تنظیم color balance رو اضافه کنیم با مقادیر زیر

Duplicate (Ctrl+J) this color balance layer and set the two layers to normal blending at 100% opacity. Here is the result:
لایه ی تنظیم color balance را تکرار کنید (کپی پیست روی لایه تنظیم کلیک و Ctrl + j را فشار بدهید)
و حالت ترکیب هر دو را به normal با شفافیت 100 درصد تنظیم کنید تا به نتیجه ی زیر برسید.
Then, give more adjustment layer above the previous layer: curves as set below:
حالا لایه های تنظیم بیشتری را بر روی لایه ی قبل اضافه می کنیم
لایه تنظیم Curves همانند تصویر زیر

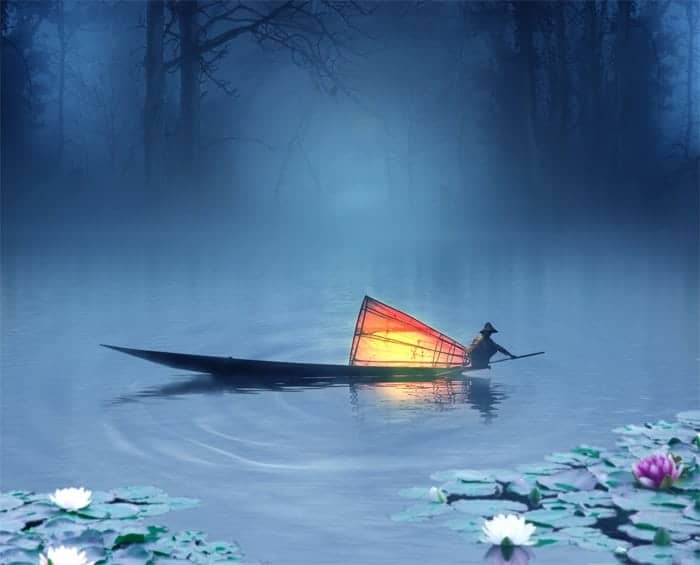
Here is the result
کار ما تا الآن
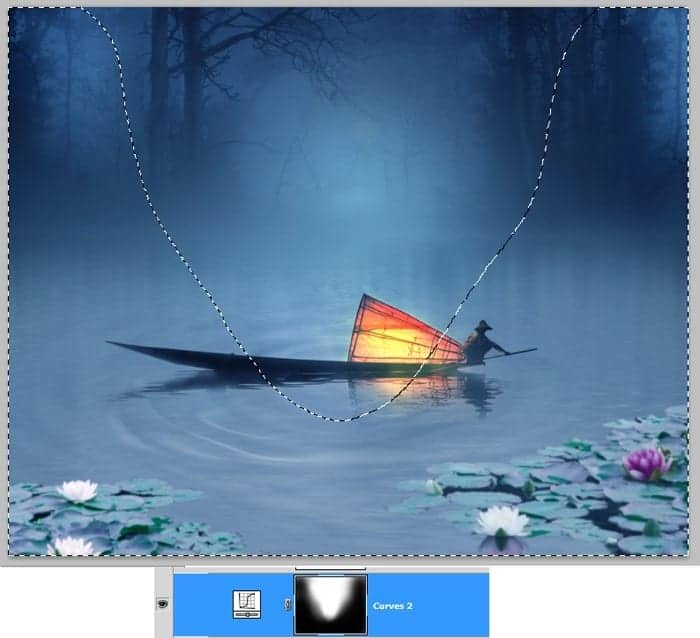
Mask some part of the curves layer:
برخی از بخش های لایه ی تنظیم curves را همانند تصویر زیر ماسک می کنیم
Finally, give the last adjustment layer: photo filter
و درنهایت اضافه کردن آخرین لایه ی تنظیم
photo filter
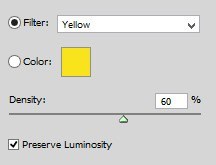
Set this photo filter layer to normal at 80% opacity. Select all the adjustment layers to group them in a folder. I named this folder adjustments
حالت ترکیب این لایه ی تنظیم photo filter را به normal با شفافیت حدود 80 درصد تنظیم کنید.
تمامی لایه های تنظیم را انتخاب کنید و آنها را در پوشه قرار بدهید.
من اسم این پوشه را Adjustments گذاشتم.

Step 19 (Where is the moon?)
So you know what we should add to our scene now, we will add the moon. Open the moon image.
مرحله 19 ( ماه کجاست ؟ )
همانطور که می دانید ما باید ماه را الآن به صحنه یمان اضافه کنیم.
تصویر ماه را در فتوشاپ باز کنید.

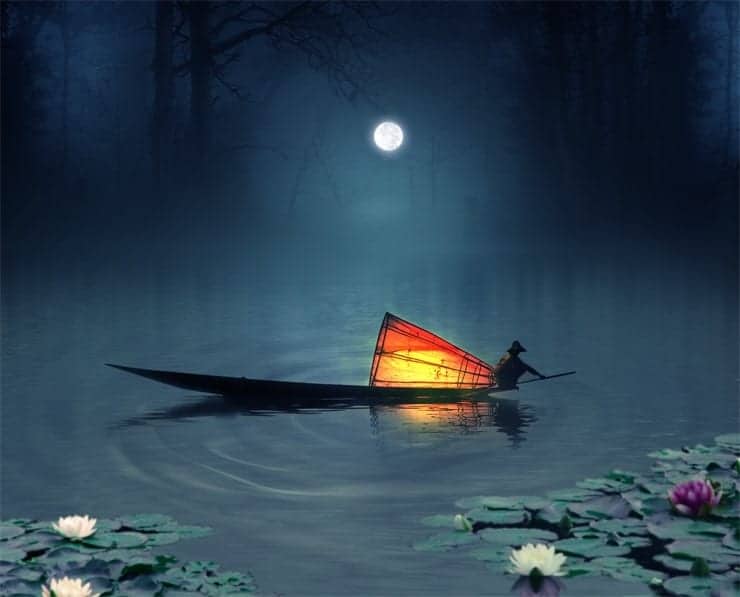
Cut out the moon and place it to the main canvas. Make sure to place this moon layer above all the other layers. Scale its size and set it to screen blending option. Here is the result:
ماه را برش بدهید و به داخل صحنه بیاورید.
مطمئن شوید که لایه ی ماه را روی تمامی لایه ها قرار دادید.
مقیاس اندازه ی آن را متناسب با صحنه کنید و حالت ترکیب آن را بر روی screen قرار دهید.
Step 20 (Reflection of the moon light)
Next, cut out the reflection of the moon light.
مرحله 20 ( انعکاس نور ماه )
حالا به تصویری که در مرحله قبل باز کردید بازگردید و انعکاس نور ماه را جدا کنید

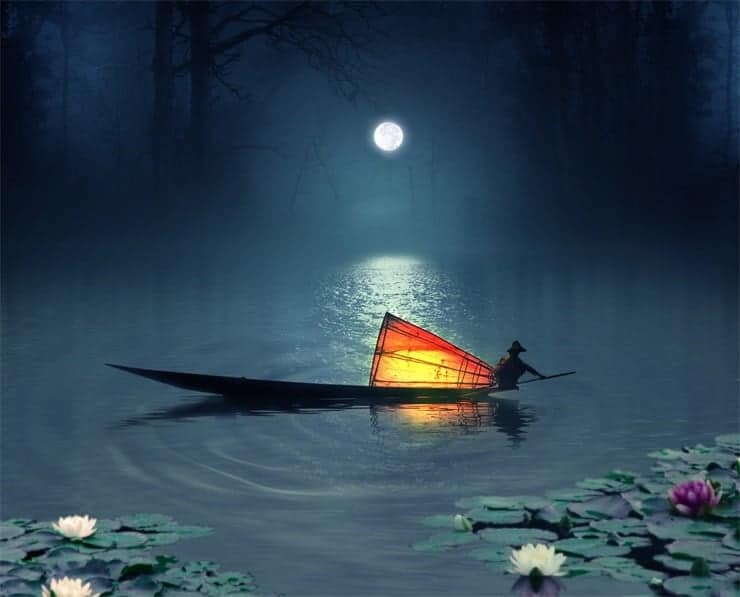
Place the cut out to the main scene. Make sure to place this layer below the fisherman folder.
انعکاس ماه را روی صحنه اصلی قرار بدهید.
مطمئن شوید که این لایه را زیر پوشه ی ماهیگیر قرار دادید.
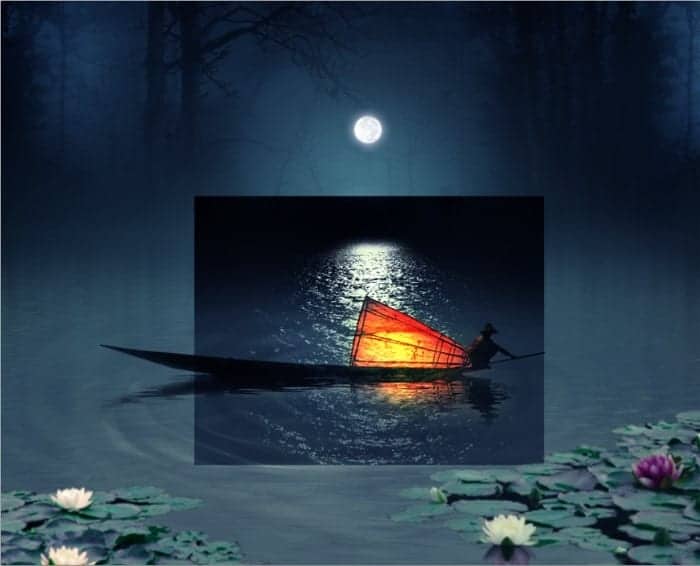
Set this layer to screen blending at about 80-90% opacity. Mask some parts of this cut out where needed.
حالت ترکیب این لایه را به screen و با شفافیت حدود 80 تا 90 درصد تنظیم کنید.
بخش هایی از لایه ی انعکاس که نیاز به ماسک دارند ماسک کنید.
Step 21 (Fisherman’s friends)
Let give the lonely fisherman some friends. Place the flying bird png image to the scene. Scale its size and position the birds flying around the fisherman. Hide some unneeded birds as the ones circled in red by masking them.
مرحله 21 ( دوستان ماهیگیر )
اجازه بدهید که به ماهیگیر تنهایمان تعدادی دوست اضافه کنیم. تصویر png پرواز پرندگان را بازکنید و به صحنه انتقال دهید.
مقایس اندازه png پرندگان را متناسب کنید و موقعیت آن را حول و حوش ماهیگیر قرار بدهید.
برخی از پرنده هایی که مورد نیاز نیستند مثل پرنده های نشان داده شده در تصویر زیر را با استفاده از ماسک مخفی کنید.


Finally, give the bird image some Gaussian blur.
درنهایت مقداری Gaussian blur به تصویر پرندگان اضافه می کنیم.

Step 22 (More colors)
Create a new layer below the adjustment folder. On this new layer, paint more color of on the lower part of the scene. Here is the result I created.
مرحله 22 ( افزودن رنگ های بیشتر )
یک لایه ی جدید زیر پوشه ی Adjustment ایجاد کنید.
روی بخش پایینی این لایه رنگ cyan را با کد هگز 1afcfc # مانند تصویر زیر نقاشی کنید.
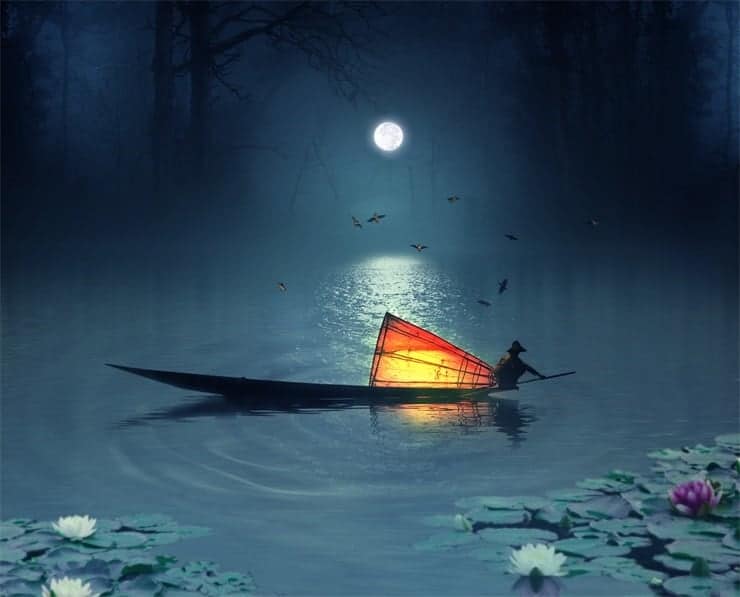
Here is the scene will look now:
صحنه ای که خواهیم دید
Step 23 (Shading)
I decided to darken the foreground a bit. Create another new layer above the previous color. Take a very soft round brush set to low opacity of about 10-15%. On this new layer, paint soft gray around the foreground. Here is the result I created.
مرحله 23 ( سایه )
من تصمیم گرفتم که منظره جلو صحنه را کمی تیره تر کنم.
یک لایه ی جدید دیگر روی لایه ی رنگ قبلی ایجاد کنید.
یک براش خیلی نرم با لبه های گرد با شفافیت حدود 10 تا 15 درصد انتخاب کنید؛ نبود درست کنید.
روی این لایه ی جدید خیلی نرم رنگ خاکستری را حول و حوش منظره جلوی صحنه نقاشی کنید.


Step 24 (Sharpening)
Make sure to be active on the topmost layer in the layer panel. Hit Shift+Ctrl+Alt+E to stamp all the visible layers. This will create a new single layer of the scene we have created. Convert this new layer into a smart object. I named this layer final result. Finally, go to filter > other > custom to give it custom filter as given below:
مرحله 24 ( تقلب کردن )
قبل از هر چیز مطمئن شوید که روی بالاترین لایه از پنل لایه ها هستید.
کلید های Shift + Ctrl + Alt + E را همزمان فشار دهید برای محر کردن تمامی لایه های مخفی.
این کار یک لایه ی مجزا از صحنه ای که ایجاد کردیم را ایجاد می کند.
این لایه جدید را به یک smart object تبدیل کنید. من اسم این را final result گذاشتم.
در نهایت به مسیر زیر بروید:
filter > other > custom
برای اضافه کردن custom filter مانند تصویر زیر عمل کنید.

و نتیجه ی این فیلتر
Optional Step
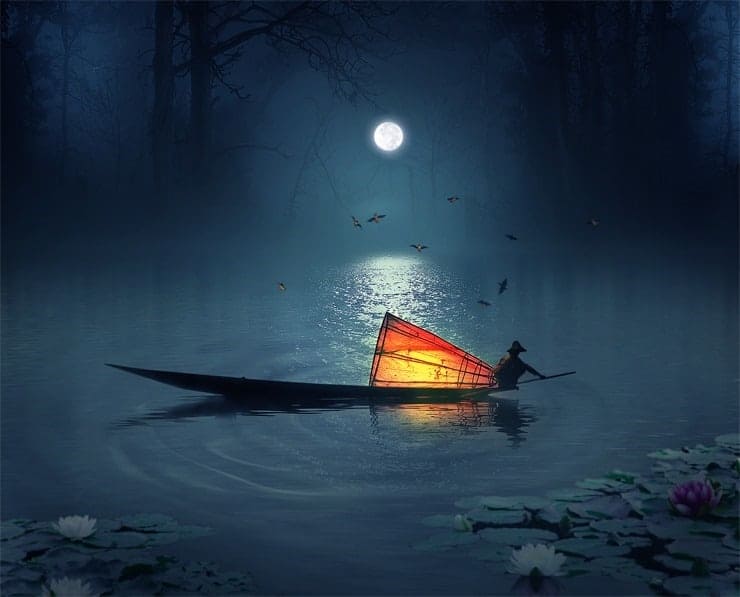
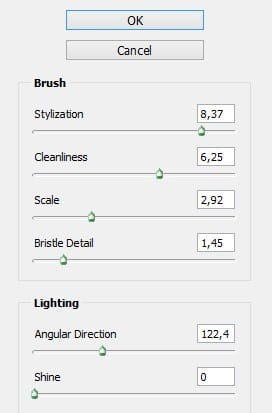
If we use photoshop cs 6, we can give some painting effect to the final result of the scene. While we are still active on the final result layer, go again to filter > oil paint. Set the filter as given below:
مرحله اختیاری
چناچه شما از فتوشاپ cs6 استفاده می کنید می توانید به صحنه افکت نقاشی بدهید.
در حالی که ما هنوز روی لایه ی final result هستیم به مسیر زیر بروید:
filter > oil paint
و مقادیر آن را مطابق با تصویر زیر وارد کنید
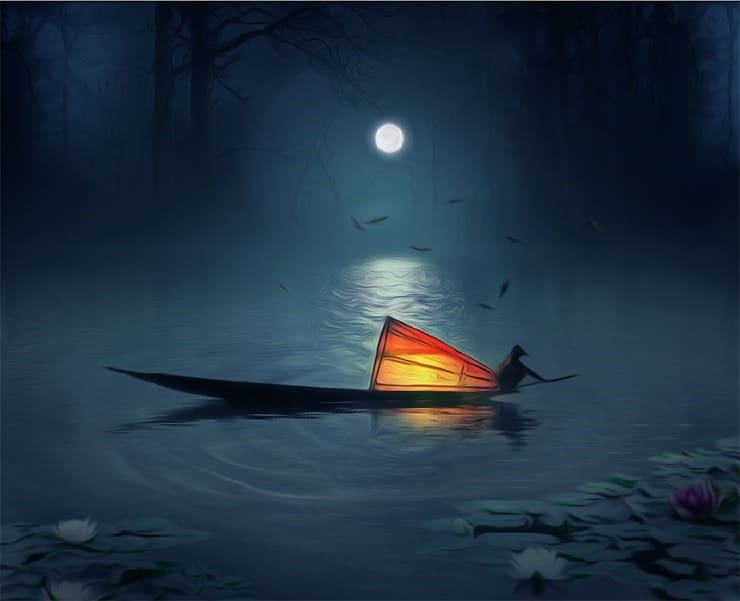
Here is the result should be:
نتیجه ای که باید بدست آورده باشید.
We can reduce the effect of this smart filter by editing its blending option. We can set its blending option to normal at 60-70% opacity to have the result like the one below:
ما می توانیم غلظت این افکت را با ویرایش و دستکاری حالت ترکیب لایه کاهش بدهیم.
ما می توانیم حالت ترکیب لایه را بر روی normal با شفافیت حدود 60 تا 70 درصد تنظیم کنیم تا به تصویر زیر برسیم.
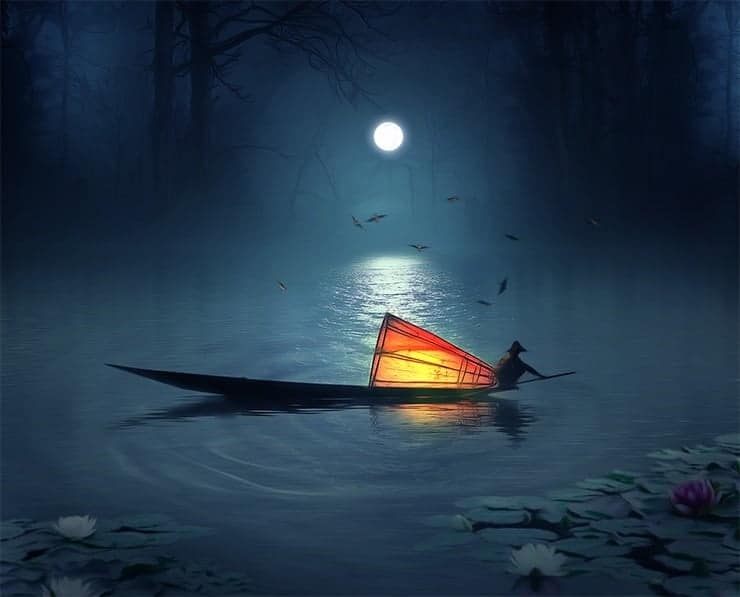
تصویر نهایی صحنه
![final result1[1]](http://www.photoshoptutorials.ws/wp-content/uploads/2014/05/final-result11.jpg "final result1[1]")
نتیجه ی نهایی مرحله اختیاری

امیدوارم این آموزش برای شما مفید بوده باشد
تا آموزش های بعدی خدانگهدار شما
برچسبها:
نویسنده: <-BlogAuthor->