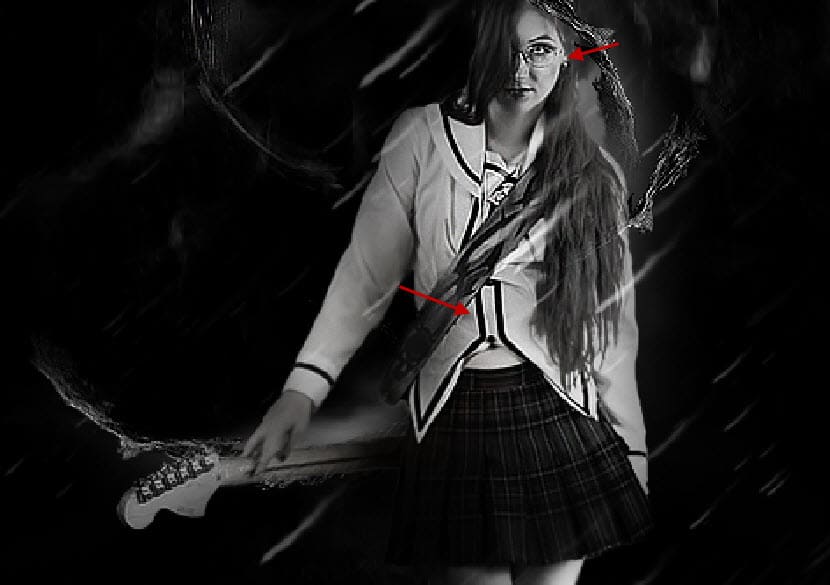
خب بیاید آموزش امروز رو هم شروع کنیم و بازم آمار بازدید کم تر از همیشه!!
برای کامل کردن آموزش شما به ابزار زیر نیار خواهید داشت:
Model – by mjranum-stock
Water Texture
مرحله 1
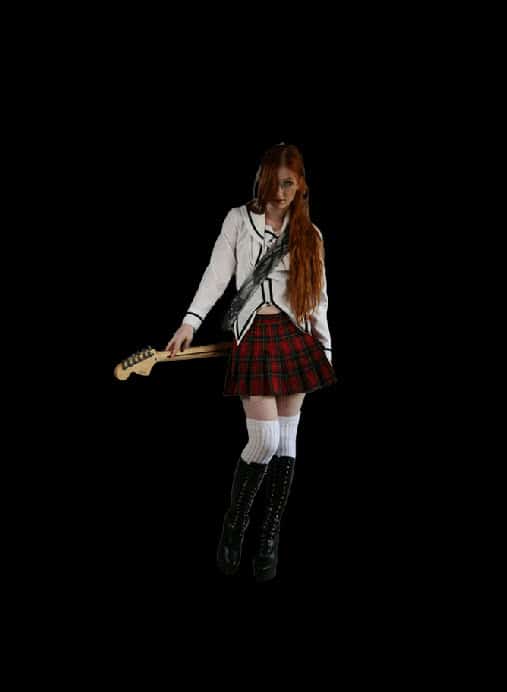
یک سند جدید ایجاد نمایید.(انداز واقعی مهم نیست)رنگ بکگراند رو سیاه قرار بدین، تصویر Model – by mjranum-stock را که دانلود کردید رو در فتوشاپ باز کنید و پس زمینه ی آن را حذف کنید و تصویر را در وسط سند انتخابی مث تصویر زیر قرار بدین:

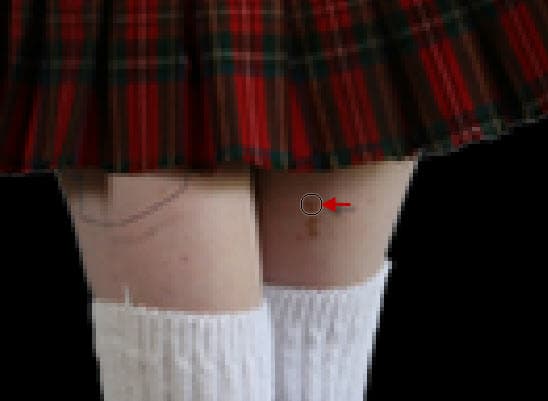
حالا ما می خواهیم با استفاده از ابزار healing tool لکه های تیره ی رو پای دختر رو محو کنیم
مث تصویر زیر:
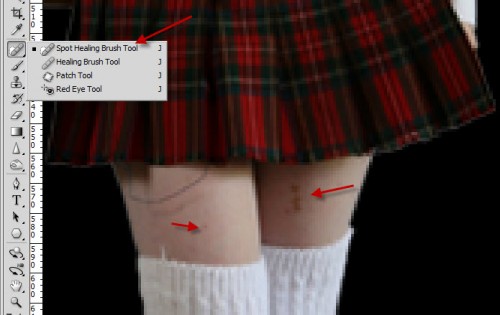
با چپ کلیک رو لکه ها با یک سایز بزرگ به راحتی لکه ها محو می شوند

تصویر نهایی بعد از محو کردن لکه های تیره با استفاده از ابزار healing tool:

با استفاده از پاک کن نرم با مقدار flow کم لبه های تصویر رو نرم کنید:

حالا دو تنطیمات زیر و cliping mask را به لایه اضاف نمایید.
تنطیمات:
Black and White

تنظیمات:
Levels

لایه ی ماسک تنظیم شده بر روی تنظیمات levels لایه:

و بعد از انجام مراحل بالا یک اثر مث تصویر ذیل خواهید داشت:

مرحله 2
We can add some cloud to act as background lighting to the model – you can use a cloud brush or the cloud filter to achieve this effect: (use Free Transform to adjust its size)

Also add some cloud behind the guitar for more effect:

Compress the cloud layer down the move it to the bottom:

Use a soft black brush to paint some shadow under the feet, make sure you following the shape of the model’ feet for best result:

Step 3
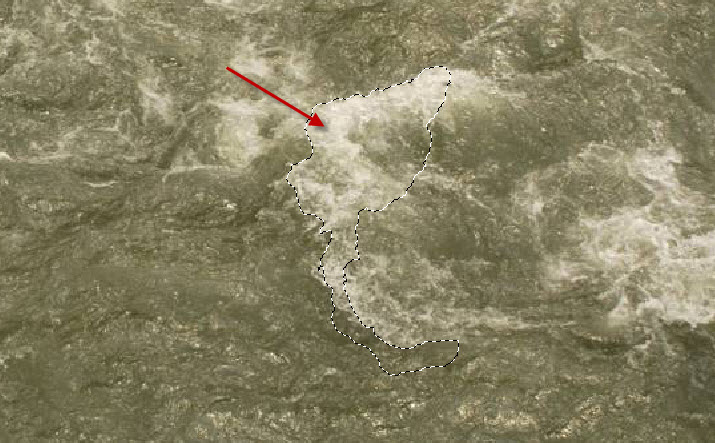
Now we can add some water texture. Load the water texture and use Quick Selection Tool to select a portion:

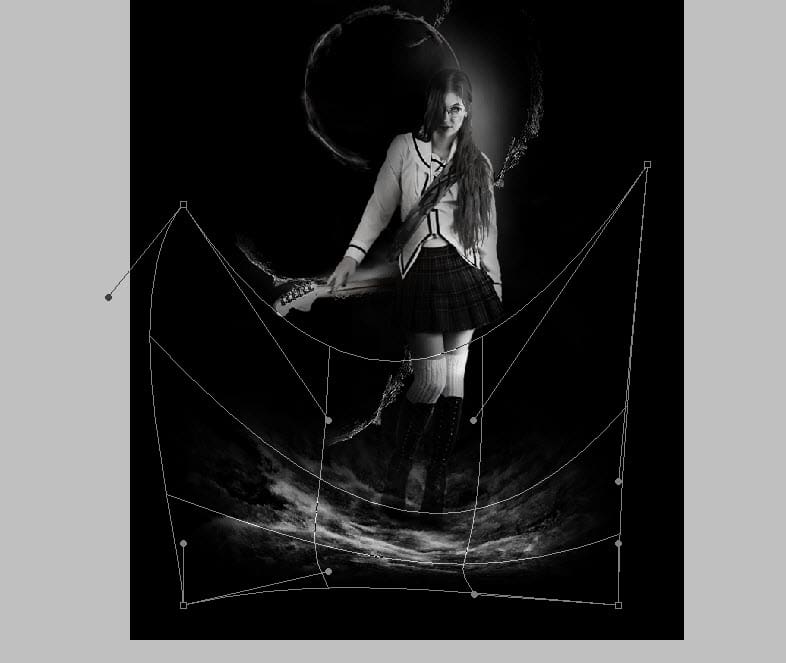
Copy and paste the selection onto our canvas and warp it a little as shown below:

Apply the following black and white adjustment to this texture:

Then apply the following Levels adjustment to this layer:

and you will have the following effect:
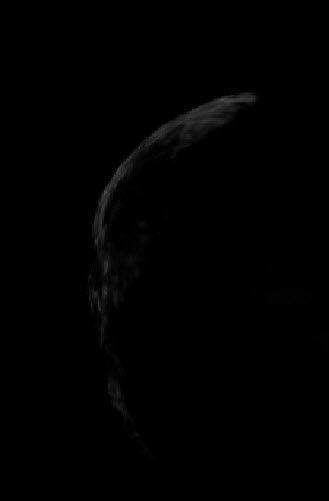
Use the Sharpen Filter to sharpen this texture a bit:

Duplicate this layer a few times and scatter them around the model:

Step 4
Draw a ring behind the model with Elliptical Marquee Tool, erase some parts with a soft eraser to create some breaking effect:

Repeat the steps described in previous step, apply some water texture on the ring, use the Warp Tool to adjust the shape when necessary:

Keep going until the water stream texture cover the entire ring:
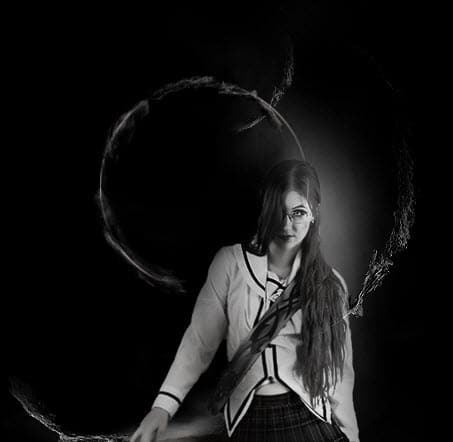
You can also put some water stream texture above the model layer to create some overlay effect:

Step 5
We can some more water pattern to the image. Go back to the Water Texture and select a portion with a 30px feather Lasso Tool:

Copy and paste the selection onto our canvas, move it to the top and apply the following black and white adjustment to it:
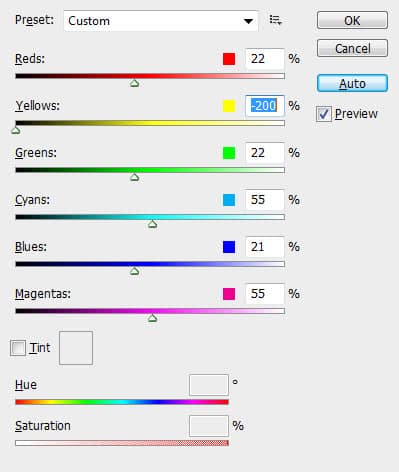
And you will have the following effect:

Duplicate this water layer once and move it to the bottom, use the Warp Tool to warp it as shown below:

We want to splash to appear behind the model, so use a soft eraser to remove the front portion”

and here is the effect so far:

Step 6
We can now add some abstract flying pattern to the image. I decided to create a custom brush for this purpose. Firstly we can create a new document sized 150px * 150px, create a new layer and paint a dot in the centre with a soft black brush:

Use the Warp Tool to warp it as shown below:

Then bring up the Liquify Filter, set the brush as below:
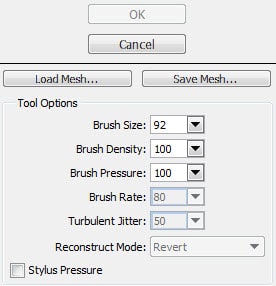
Use Forward Warp option to liquify it to this following shape:

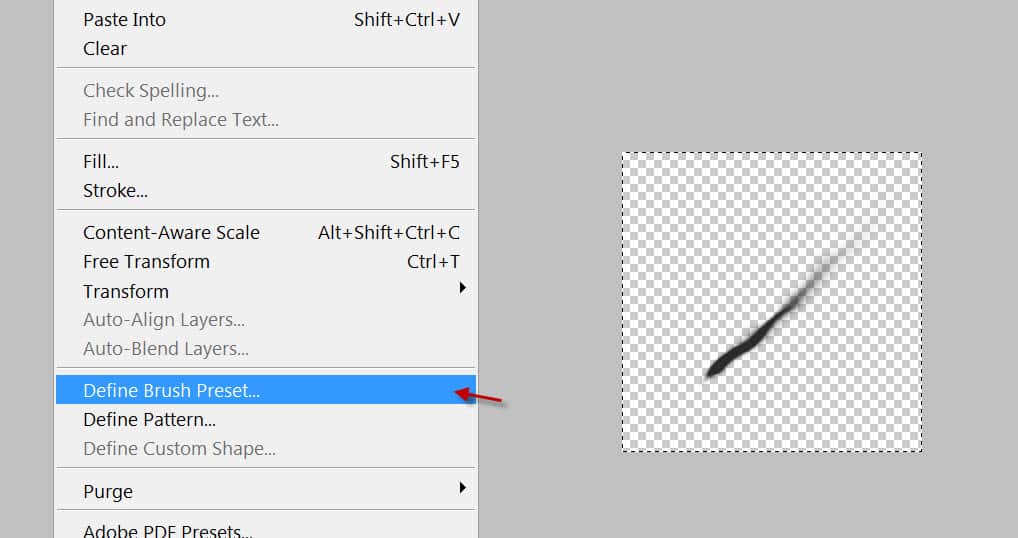
Make sure you turn off the background layer, Hit “Ctrl + A” to selection all, then go to “Edit > Define Brush Preset”:

After defining the brush, press F5 to bring the brush option window, apply the following settings:
Shape Dynamics

Scattering

Other Dynamics

Tick “Airbrush”, “Smoothing” and “Protect Texture” options. Use this brush to paint some patterns as shown below on the image:
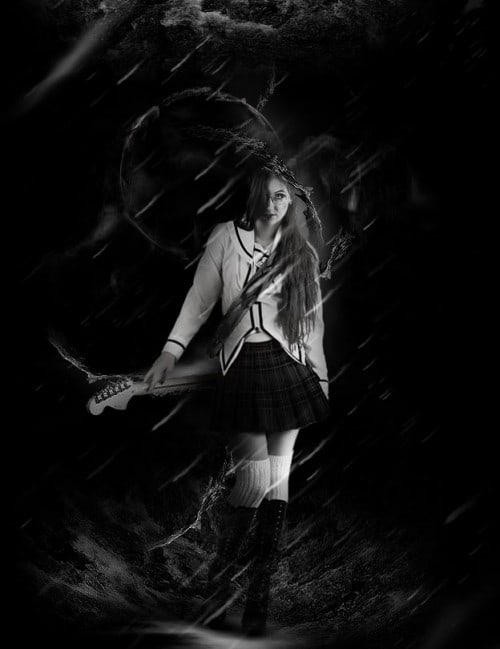
Step 7
We’re almost done. For some final retouches we can use the Sharpen Tool from the Toolbox to sharpen a number of areas on the model: (flatten the image first)
Hint: set the strength of the sharpen tool to around 30-40%. Don’t over-sharpen the image.

Duplicate this layer and apply the following Accented Edges filter to it:

We don’t want the whole image to have this filter effect, so add the following layer mask to hide centain portion:

and you will have the following effect:
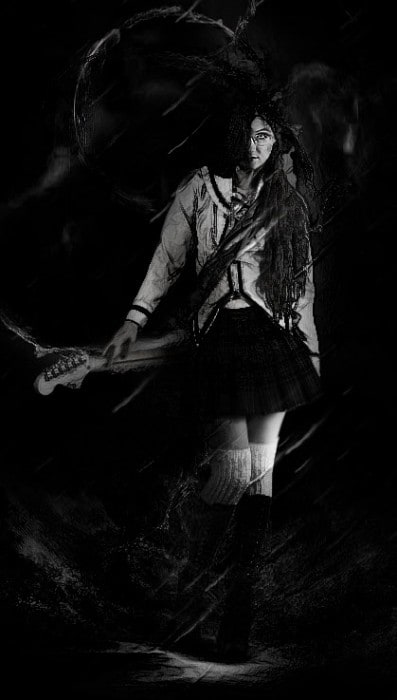
Now you can add a few colours for this image, you can do it via several methods:
- Colour balance adjustment layer with mask
- Paint with a soft brush on a new layer (set blending mode to “overlay”, “soft light” or “color”)
- Play with Channels
You can experiment with the aboves and see what result that brings you.
I have the following final effect: (click to enlarge)
Version 1

Alternative Version with more colour:

Hope you enjoy this tutorial and find it useful! Till next time, have a great day!
برچسبها:
نویسنده: <-BlogAuthor->